
- Knowledge Base Categories:
- School Accounting System
- Payroll
Training Tidbit: How can I use the new standard template for employee direct deposit stubs?
To define a new check setup for employee direct deposit stubs using the new standard template, complete the following:
- In Payroll, select the Maintenance menu and then Check Setup – Employees.
- At the Check Setup – Employees screen, select the Options menu and Use Template.
- On the Use Template screen:
- Enter a name to use for the new setup in the Report Name field.
- In the Check Layout field, select Stub Only.
- Click the Execute button, and when prompted that the check setup was created, click OK.
- Complete the Print Zero Balance Checks field and Sort Checks by Custom Referenced Field field as desired for the new format.
- In the Checking Accounts section, specify which checking accounts will use the new format as the default when printing direct deposit stubs.
- Click the Save button to save the changes.
- If desired, click the Execute button to print a test of the check setup.
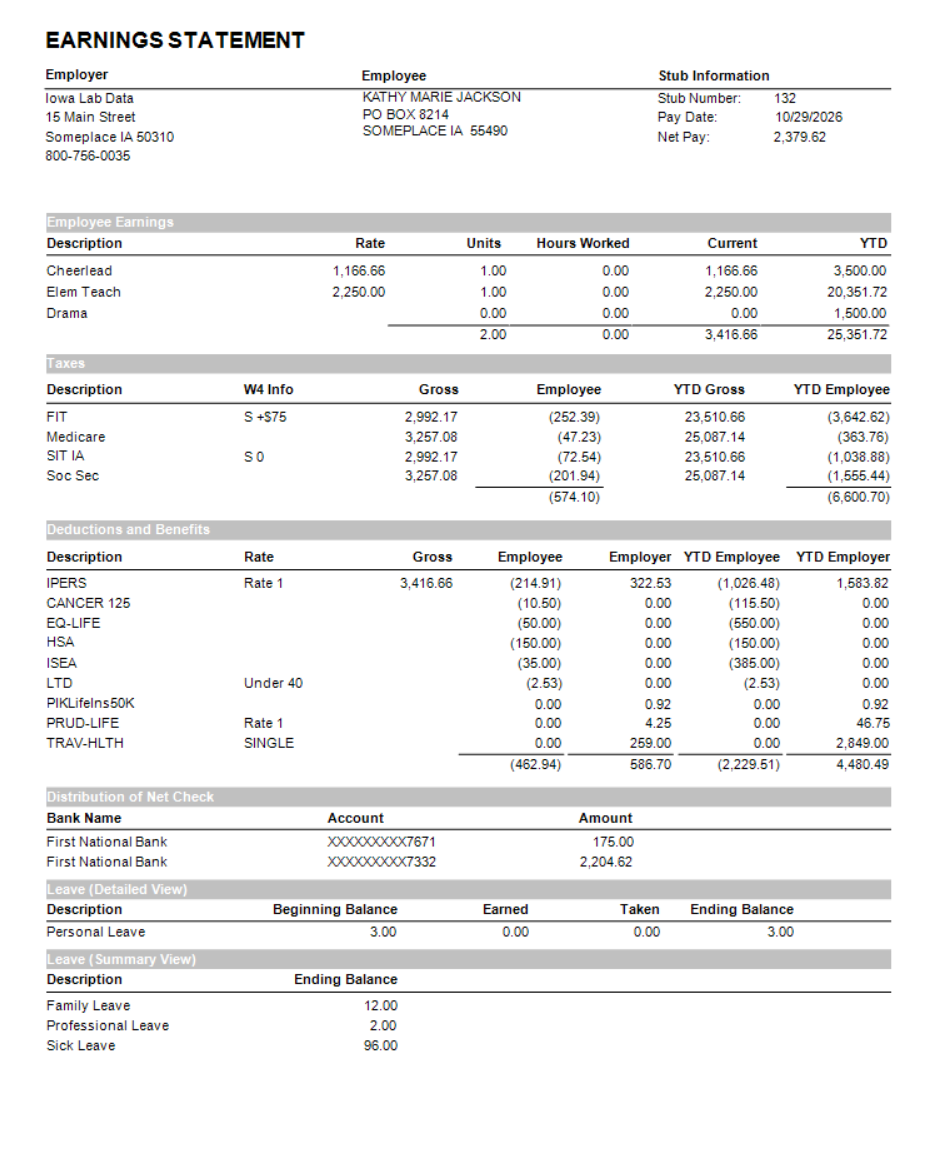
Below is a sample of the direct deposit stubs printed for an employee where the check setup was created using the standard template.
Important: As shown in the sample, the standard template includes the pay rate and hours worked on the stubs. Keep in mind, if an employee is paid with the same pay code with different rates in different payroll check cycles, there will be multiple lines on the stub for the same pay code showing the various rates; and if an employee is paid with the same pay code with different rates all in one payroll check cycle, the pay rate for the pay code will reflect the highest rate.
Tip: Check setups for direct deposit stubs using the standard templates for vendors and payees can also be created by completing similar steps as noted above from within the Check Setup – Vendors and Check Setup – Payees options. For detailed instructions, refer to the Direct Deposit Stubs Standard Template Setup Checklist in the Help File.